
Ultramarines Forge World Falchion Super Heavy Tank WIP part 1


Day 1 and 2 WIP photos.  All the sanding, cutting, smoothing and washing of the component parts has been completed.  My weathering has begun – the tracks have been given a light coating of sandy paste.  
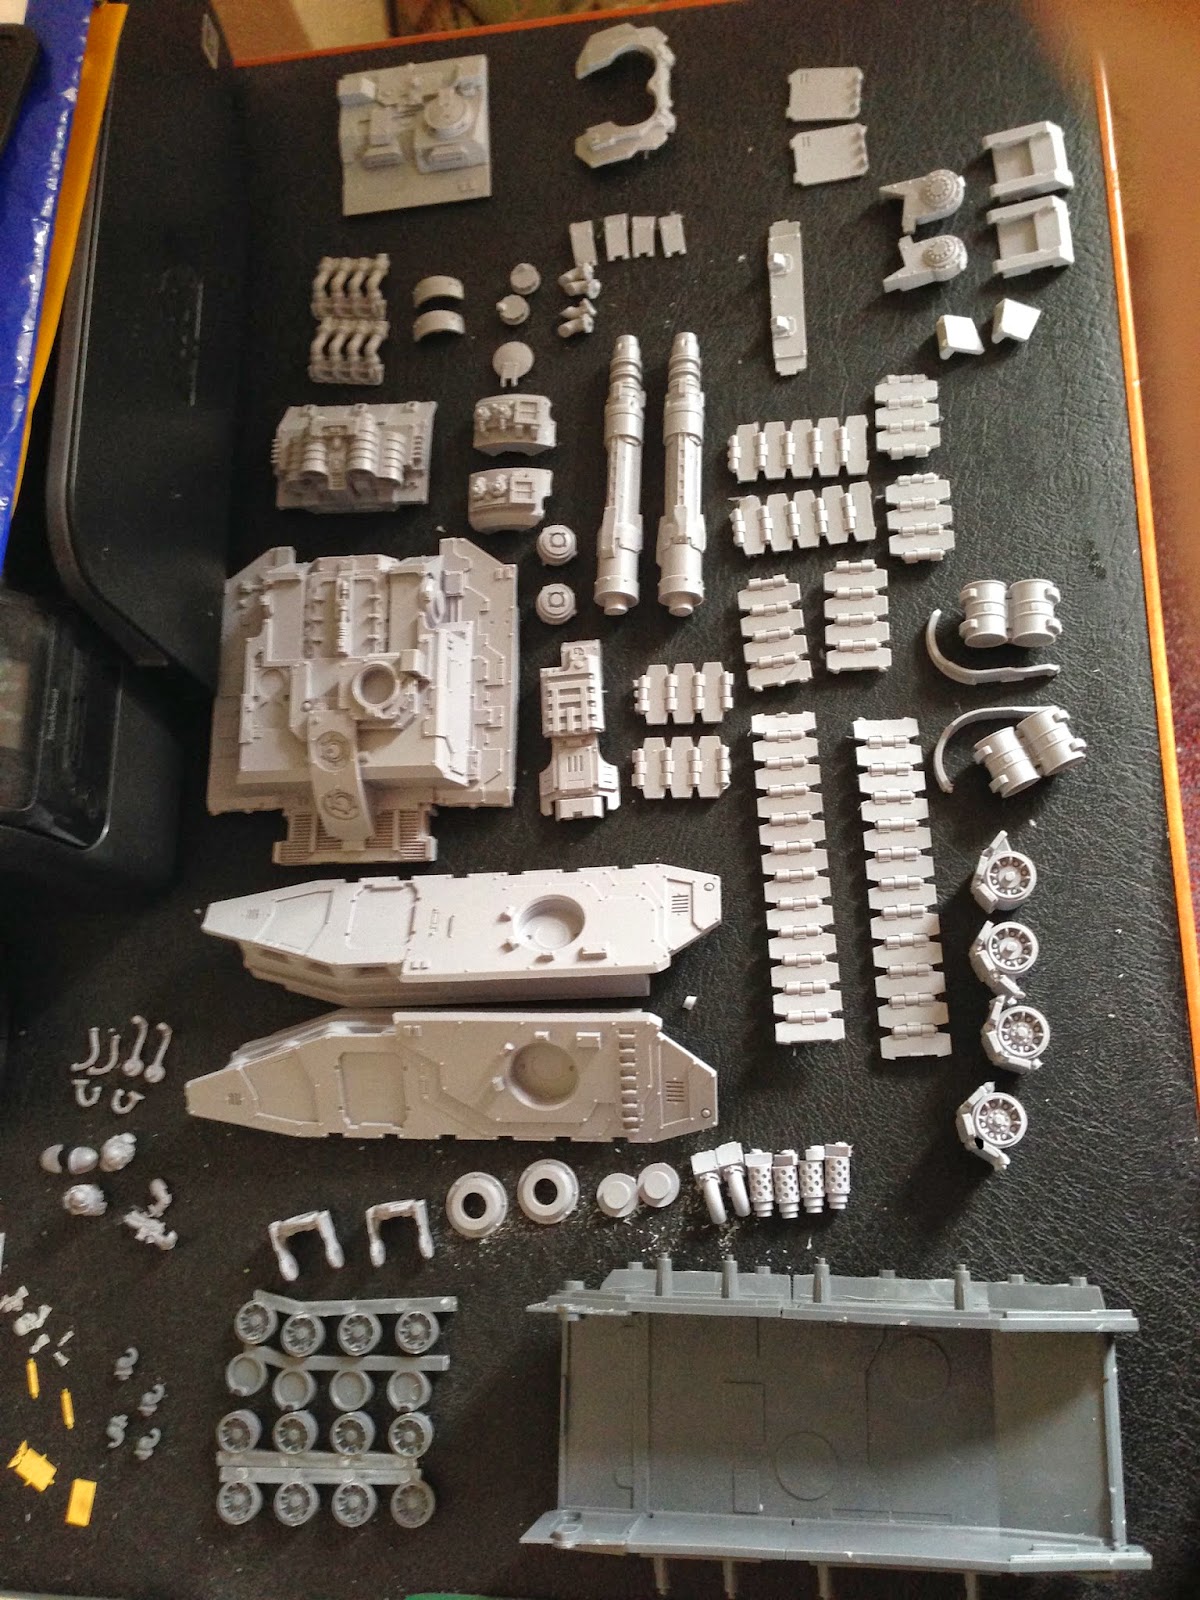


The build was pretty good and the amount of resin release agent was very low so not too long spent scrubbing away with the toothbrush.  The tracks MUST MUST MUST be dry fitted first – even then I still made a couple of car crash errors with super glue that luckily I managed to rectify. 

Day 2 has seen all parts receive their Vallejo Grey undercoat and at least one base colour ready for the various other stages to come.  All the release agent is off and the paint went on perfectly this time – I had problems with the Glaive. 


The main body has been pre-shaded with black and white on the grey primer to create my greyscale highlight effect.  French blue to be applied tomorrow! HTB.


Comments

  1. Interesting to see some of the weathering effects take place prior to the priming. Very interesting. Thanks for documenting this. I recently got an airbrush and was planning on painting the sicarian (though a much smaller tank) using it.

    ReplyDelete

Post a Comment

Popular posts from this blog

House Cadmus Imperial Knights

This post has been sat in my archive for far too long. I am not going to pretend it is new work - it has been up on my Instagram for some time but I thought I would show you some WIP photos and talk through some tips on making what is a very large project manageable. Hopefully of use to someone out there! Three Kinghts is a decent amount of work - but to be fair, you pretty much have an army once you are done.  To keep me motivated and to make the project achievable I broke it down into stages: 1. The Metal Skeletons 2. Panel Work 3. Bases 4. Weaponry. This approach will save you time and will help you get 3 Knights above table top quality quickly and efficiently. It won't feel like it as you go - but trust me when you reflect, you will have saved yourself some serious time.  There is also a uniformity you can't replicate from doing 1 then adding 2 later on... Take the pain and work in multiples....read on... 1. The Metal Skeletons: Army Painter Silver Rattle Ca

Forge World Scorpion Type II – Saim-Hann

Forge World Scorpion Type II – Saim-Hann With my first project under my belt, I dug out a Forge World kit that had been left under the bed for a good number of years.  I could not ge the smooth finish I wanted so parked the model to one side, but never came back to it.  All the practicing of pre-shading, zen highlighting and shading using the Falcon kits drove me to dig it out and get it done.  This will be more step by step but do ask questions below if you want something made clearer.  Again, Buypainted! gave a vast amount of guidance and inspiration - credit where credit is due! 1.                The main hull was constructed, wing-lets, tail section etc.  The turret was also built however don’t do what I did initially and leave the pulsars sperate.  The crew and smaller weapons were mounted on old sprues to assist in painting.  The whole lot was primed us Vallejo Polyurethane Grey Primer – great stuff, and key to get the different sh

Ultramarines Super Heavy Falchion Tank

Finally finished the Falchion and another model in line with the core theme of the blog.  I picked this up back in March at the Forge World open day, with a view to have it finished before wider release... anyway...  it's done now.  The techniques involved are covered in the Glaive tutorial.  This time around I have tried to apply some of the pointers and tips passed on from Matt Murphy-Kane and Mark Bedford from not only Warhmmer Fest, but the FW open day to.